Import Your First Recipe
Articles in this section
🚀 Getting Started
📥 Importing Recipes
- How to Import Recipes
- Import from a Website
- Import from Instagram
- Import from Facebook
- Import from TikTok
- Import from Pinterest
- Import from YouTube
- Scan a Recipe from Photo
- Dictate a Recipe by Voice
- Import by Pasting Text
- Use the In-App Browser
- Write a Recipe from Scratch
- Review & Edit Before Saving
- Understanding Import Credits
📂 Managing Recipes
👨🍳 Cooking Mode
📅 Meal Planning
🛒 Grocery List
📤 Sharing & Export
💳 Billing & Subscription
⚙️ Account & Settings
ℹ️ About Cookonut
💡 Ideas & Feedback
Importing a recipe is the fastest way to build your collection. In this guide, we’ll walk through the most common method — saving a recipe from a website — so you can see how the whole process works.
Before You Start
Think of a recipe you’d like to save. It can be from any food blog, recipe website, or online magazine. You don’t need to copy anything — you’ll find it right inside Cookonut.
Step-by-Step: Import from the Web
- Open Cookonut and go to the Recipes tab
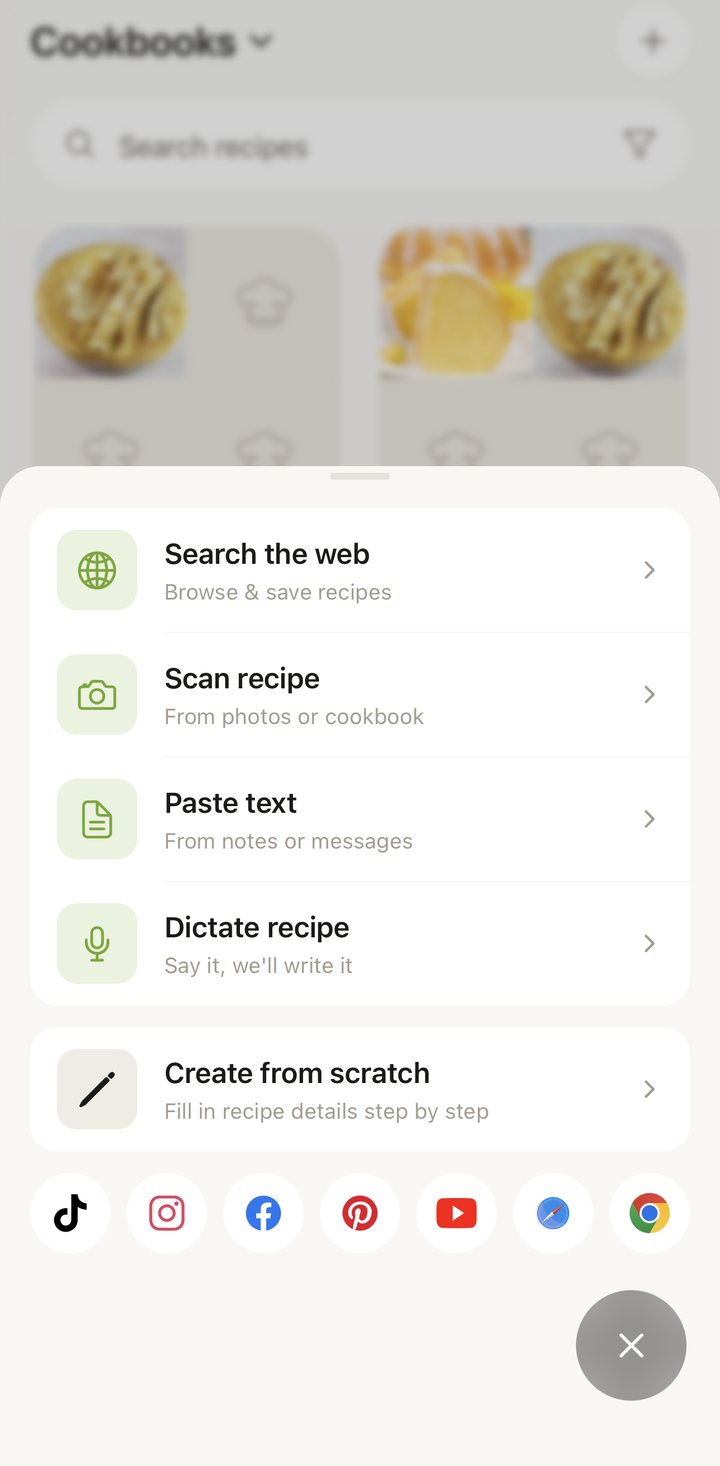
- Tap the + button (you’ll find it at the bottom of the screen) to open the Add Recipe hub
- Choose Search the web
- Search for the recipe (e.g., “easy banana bread recipe”) or enter a website address, then open the recipe page
- With the full recipe on screen, tap Save
Cookonut will now read the page and extract the recipe. This usually takes just a few seconds. You’ll see a loading indicator while the recipe is being analyzed.
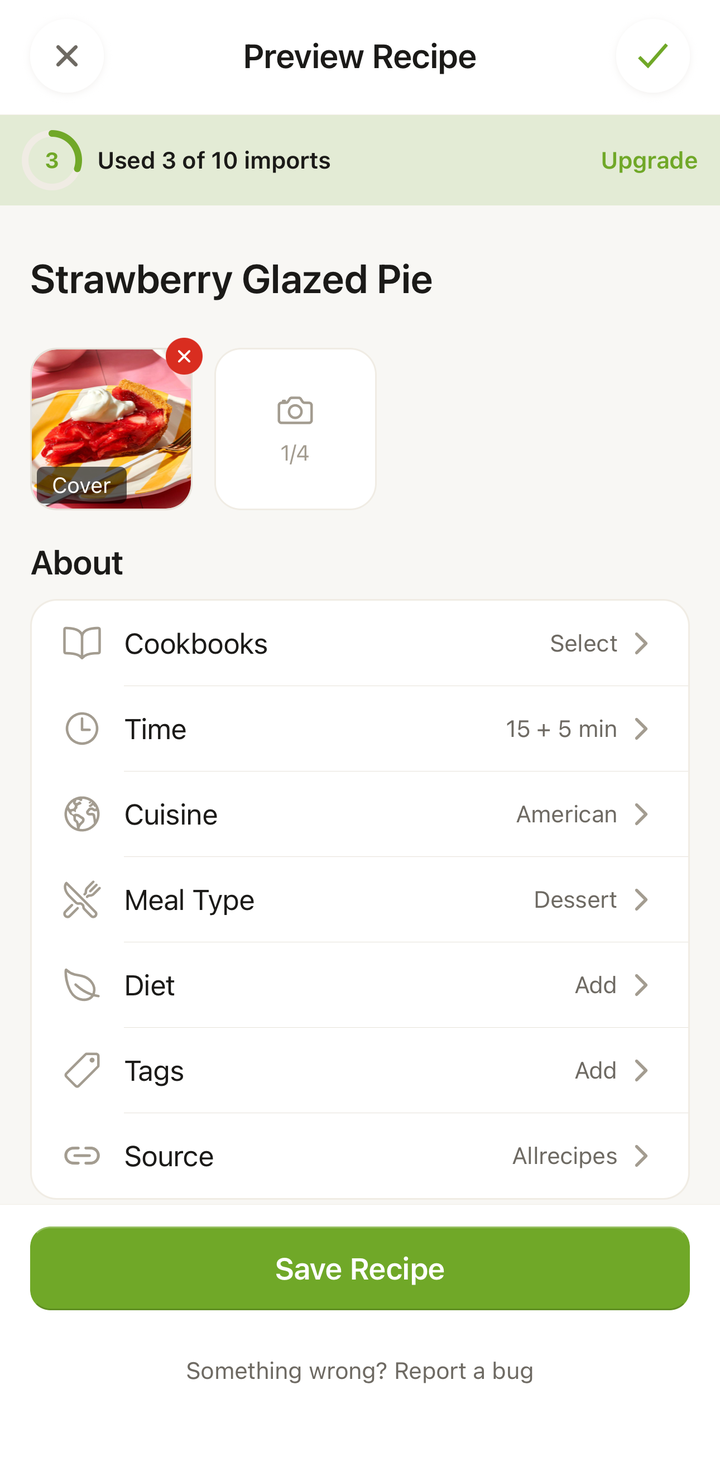
Review the Import
Once processing is complete, you’ll land on the import preview screen. Here you’ll see everything Cookonut extracted:
- Title and description
- Photo (if available on the source page)
- Ingredients list with quantities and units
- Step-by-step instructions
- Prep time, cook time, and servings
- Tags like meal type, cuisine, and category
Take a moment to review everything. Most recipes import perfectly, but you might occasionally want to:
- Fix a typo in the title
- Adjust a quantity if it looks off
- Add or remove a tag
- Assign the recipe to a cookbook
You can edit any field by tapping on it directly in the preview.
Save the Recipe
When everything looks good:
- Tap Save at the bottom of the preview screen
- The recipe is now saved to your collection
That’s it! You’ll be taken to the full recipe view where you can read through the instructions, start cooking mode, or add the recipe to your meal plan.
What About Credits?
This import used 1 AI credit from your monthly allowance. On the free plan, you get 10 credits per month — enough to import about 2-3 recipes per week. All AI import methods (Search the web, Scan recipe, Dictate recipe, Paste text) share the same credit pool.
Creating a recipe manually (using Create from scratch) does not use any credits, so you always have that as an unlimited alternative.
Quick Tips for Your First Import
- The cleaner the source, the better the result. Well-structured food blogs tend to import perfectly. Social media posts or unusual formats may need a bit more editing.
- You can import from social media too. Open the post in Instagram, Facebook, TikTok, Pinterest, or YouTube and share it to Cookonut — see our social import guides.
- Try the share sheet. Many people find it easiest to share a recipe directly from their browser or a social app to Cookonut using the system share menu.
What’s Next?
Now that you’ve imported your first recipe, try these:
- Import from different sources — try Scan recipe for a cookbook page, Dictate recipe for a voice note, or share a recipe from a social app
- Create a cookbook — organize your recipes into collections
- Plan a meal — drag your new recipe into the meal planner
- Start cooking — tap the Cook button to enter cooking mode
You’re off to a great start. Welcome to a more organized kitchen!
Thanks for your feedback! We're glad it helped.