Set Your Preferences
Articles in this section
🚀 Getting Started
📥 Importing Recipes
- How to Import Recipes
- Import from a Website
- Import from Instagram
- Import from Facebook
- Import from TikTok
- Import from Pinterest
- Import from YouTube
- Scan a Recipe from Photo
- Dictate a Recipe by Voice
- Import by Pasting Text
- Use the In-App Browser
- Write a Recipe from Scratch
- Review & Edit Before Saving
- Understanding Import Credits
📂 Managing Recipes
👨🍳 Cooking Mode
📅 Meal Planning
🛒 Grocery List
📤 Sharing & Export
💳 Billing & Subscription
⚙️ Account & Settings
ℹ️ About Cookonut
💡 Ideas & Feedback
Cookonut works great out of the box, but taking a minute to adjust your preferences makes the experience feel truly personal. Here’s how to set everything up just the way you like it.
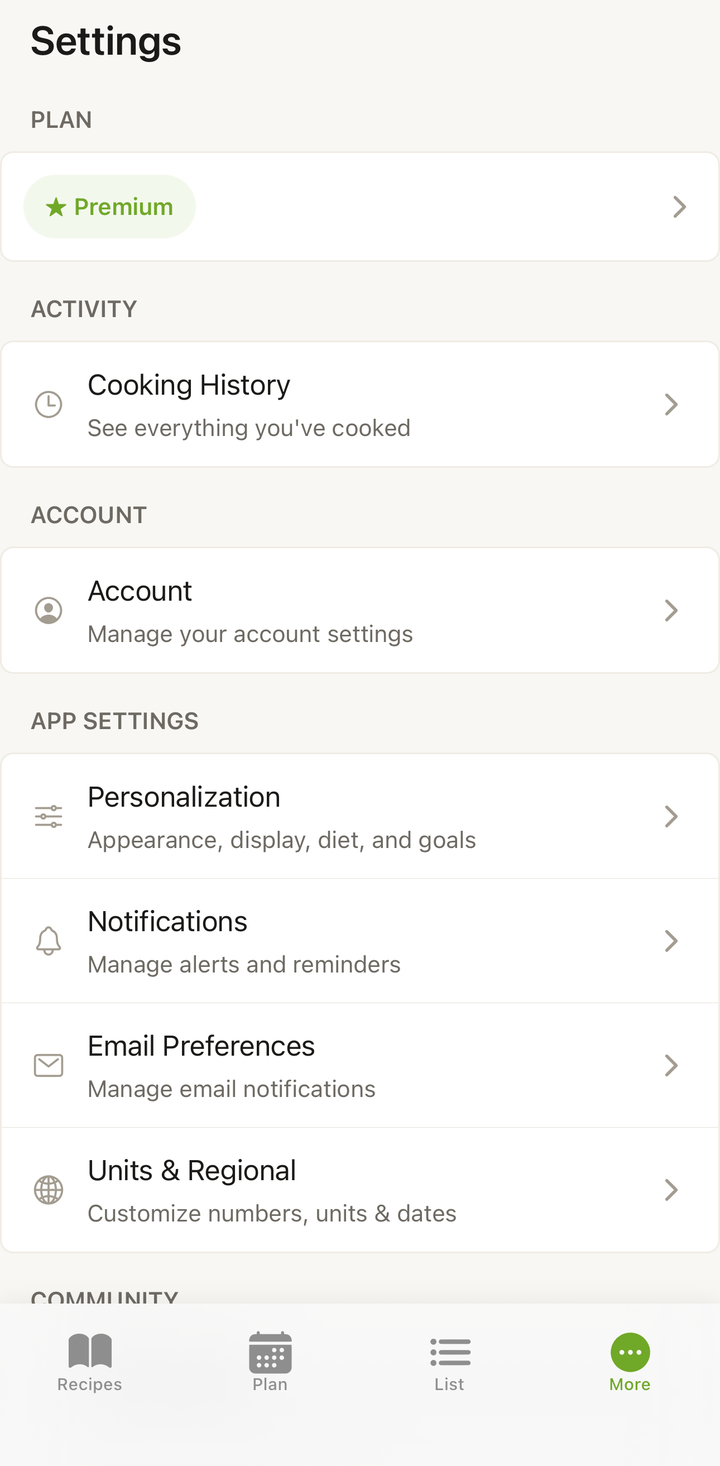
How to Access Settings
- Open Cookonut
- Go to the More tab
- You’ll see all available settings organized into sections
Language
Cookonut supports 8 languages:
- English
- Polish (Polski)
- German (Deutsch)
- French (Français)
- Spanish (Español)
- Italian (Italiano)
- Portuguese (Português)
- Brazilian Portuguese (Português do Brasil)
To change your language:
- Go to the More tab
- Tap Units & Regional
- Under Language & Translation, tap App language
- Select your preferred language — all menus, buttons, and labels update immediately
This setting controls the app interface language. Recipe content stays in whatever language it was imported in, unless you use the translation feature (available with Premium).
Measurement Units
Choose between metric and US standard units so recipes display measurements in the system you’re comfortable with:
- Go to the More tab
- Tap Units & Regional
- Under Measurement units, choose Metric (grams, milliliters) or US Standard (ounces, cups)
When you change units, existing recipes will automatically show converted measurements. You can also convert units on the fly while viewing any recipe.
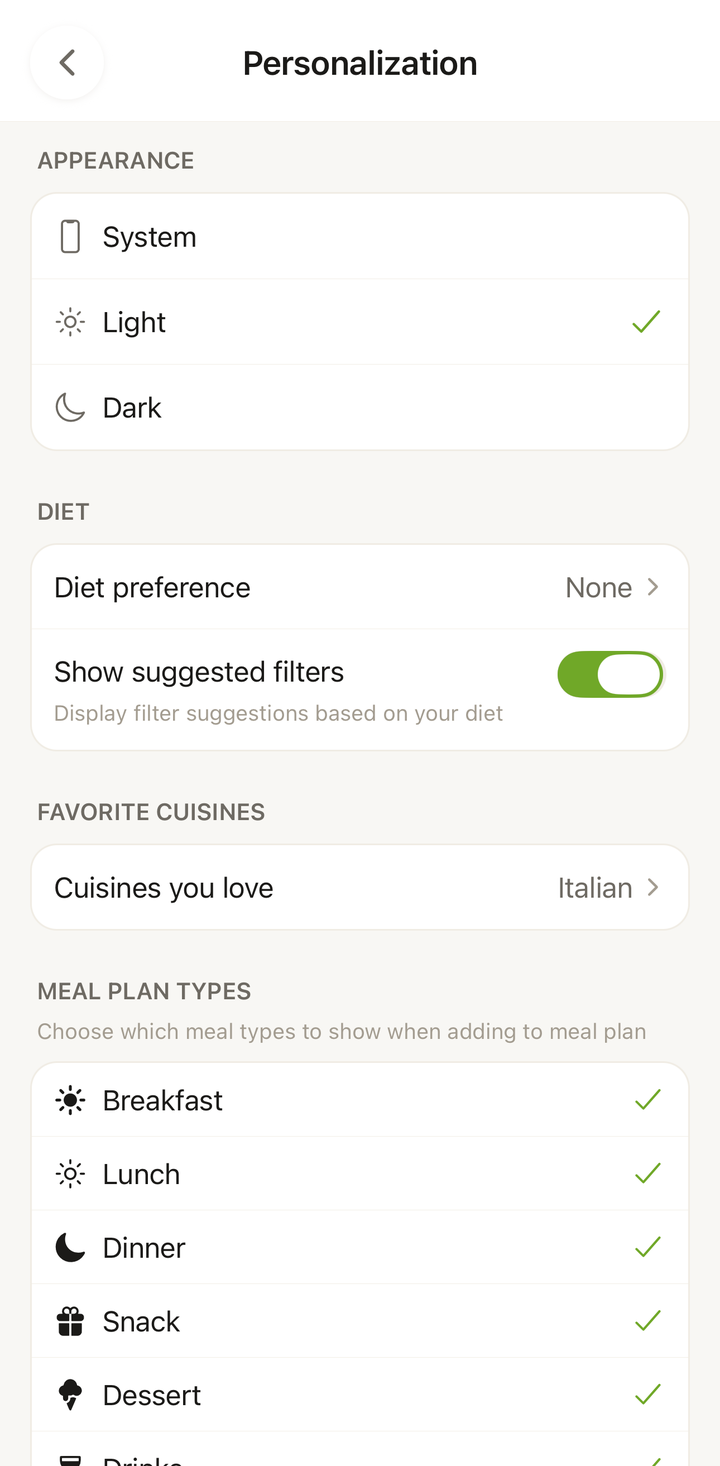
Appearance (Theme)
Cookonut offers light and dark themes:
- Go to the More tab
- Tap Personalization
- Under Appearance, choose from:
- Light — bright background, easy on the eyes during the day
- Dark — darker tones, great for evening use and battery saving on OLED screens
- System — automatically follows your phone’s system-wide setting
Notifications
Cookonut has a detailed notification settings screen with options organized into sections:
- Cooking — Timer alerts when your cooking timer finishes
- Sharing — Notifications when someone shares a recipe with you
- Meal Planning — Weekly reminders to plan your meals (with configurable time and days)
- Account — Reminders about trial periods and Premium subscription status
- Tips & Suggestions — Feature tips, a monthly cooking recap email, and onboarding tips for new users
- Your Feedback — Updates on ideas you’ve submitted, features you’ve voted for, and bugs you’ve reported
- In-App Messages — Banners and announcements shown inside the app
Most notifications are on by default. To manage them:
- Go to More > Notifications
- Toggle each type on or off
- Tap Save
For the full list and recommendations, see Notification Settings.
What You Can Customize Later
Beyond these core preferences, you’ll discover additional settings as you use the app:
- Default servings — set how many servings you typically cook for
- Grocery list sorting — choose how items are grouped (by category, by recipe, or as a flat list)
- Meal plan start day — start your week on Monday or Sunday
Preferences Are Synced
All your preferences are tied to your account and sync across devices. If you sign in on a new phone or tablet, your language, units, theme, and all other settings will be right there waiting for you.
Recommended Setup for New Users
If you’re just getting started, we suggest:
- Set your language to your native language
- Choose your units — metric if you’re in Europe, imperial if you’re in the US
- Set appearance to System — so it matches your phone automatically
- Leave notifications mostly as-is — the defaults are sensible, and timer alerts are the most useful day-to-day
Everything else can wait until you’re more familiar with the app. You can always come back to Settings and make changes at any time.
Thanks for your feedback! We're glad it helped.